


Humidity can quietly invade your home, encouraging mold growth and affecting your family’s health. Keeping your dehumidifier in top shape is key to stopping this threat. This guide covers easy fixes for common problems like fan or sensor issues, helping your unit run efficiently.
Quick-Start: Diagnosing Dehumidifier Not Working Issues
If your dehumidifier not working, first check power, key components, and the surrounding environment. These steps fix most issues fast and save on repair costs.
Power Problems? Check These 3 Essentials First
A common reason for dehumidifier not working is an unstable power source or damaged cord. If your GFCI breaker tripped, reset it after unplugging the unit. Use a grounded outlet to stay safe and protect your warranty.
Compressor Silent? Wake It Up Without Calling a Pro
A compressor pause often protects the unit, not signals a problem. Wait three minutes after turning it on to prevent damage. If it seems stuck, gently tap the housing with a rubber tool— never hit hard. Ensure the room temperature is above 41oF, as colder air stops operation to prevent harm and maintain smooth performance.
Fan Not Spinning? Simple Tweaks for Instant Revival
A blocked fan can also make your dehumidifier not working, so clean blades and motor areas regularly. Unplug your dehumidifier and remove the front panel to gently clean blades with a soft brush. Lightly oil bearings if recommended, and check capacitor connections for corrosion, tightening carefully. In busy areas like basements, raise the unit six inches to improve airflow. These simple steps can quickly restore fan rotation and boost performance.
Why is My Dehumidifier Not Collecting Water? Proven Fixes Inside
If your dehumidifier is not collecting water in a basement, airflow and settings are usually the cause. Keep humidity between 50-60% and follow simple fixes to restore proper water removal and a healthy, comfortable home.
Room Too Humid? Optimal Settings for Maximum Moisture Pull
Too much moisture can overwhelm your unit, causing your dehumidifier not collecting water efficiently if settings are not correct. Set the target humidity to 45-55% for basements or crawl spaces, adjusting slowly on the control panel. Use continuous mode for very damp areas, but watch for over-drying. Keep the unit centered with space around it to boost airflow and efficiency.

Filter Fiasco: When Dirty Air Blocks Your Water Harvest
Dirty filters block airflow, making your dehumidifier not collecting water effectively, which can encourage bacterial growth. Vacuum filters monthly, wash reusable ones, and replace pleated filters every three months. Keeping filters clean maintains peak performance and protects your home effectively.
Faulty Humidity Sensor Causing Dehumidifier Not Collecting Water
Faulty sensors give wrong readings, making units stop when moisture is real. Reset by cycling power three times, then calibrate at 50% RH. Clean probes with alcohol to remove residue. Menu hold opens digital checks to adjust settings for year-round protection.
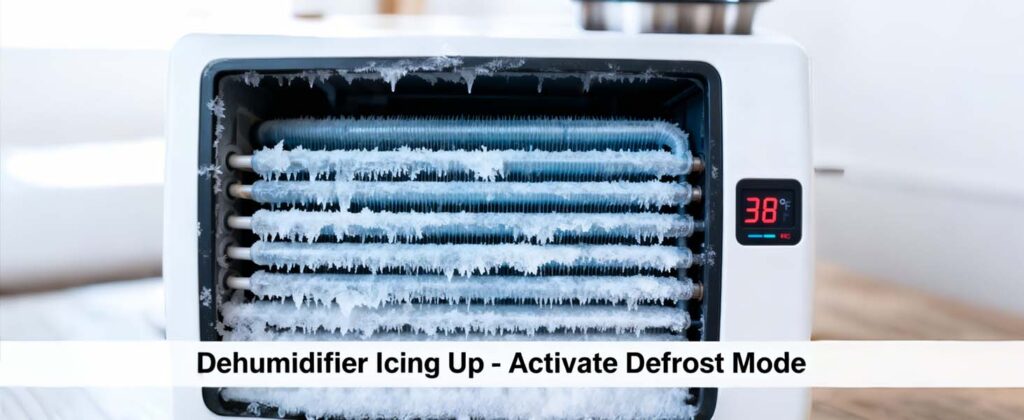
Dehumidifier Icing Up: Melt Away Frost and Prevent Freezes
When your dehumidifier icing up, frost on coils indicates cold stress, risking compressor burnout if not addressed. In winter, run carefully to avoid ice and keep efficiency.
Temperature Too Low? Smart Strategies to Stay Above Freezing
Cold rooms can lead to dehumidifier icing up, blocking refrigerant flow and reducing efficiency. Relocate the unit to warmer zones or pair it with a space heater set to 68oF minimum, monitoring via integrated thermostats. Insulate nearby ducts to retain warmth, reducing cold infiltration by 25%.
Defrost Mode Magic: Activating Built-In Thaw Cycles
Activating defrost mode prevents your dehumidifier icing up and maintains peak performance. If a manual defrost option exists, press the icon and wait 10–15 minutes for the ice to melt without shutting down the unit completely. AlorAir WHD units use an automatic defrost system that activates when coil temperatures drop too low, melting ice without user intervention.
Long-Term Prevention: Upgrades for Ice-Proof Performance
Invest in low-ambient kits that lower startup thresholds to 34°F, ideal for year-round use in variable climates. Seal room gaps with weather stripping to stabilize internals, and schedule annual technician tune-ups for refrigerant balance.
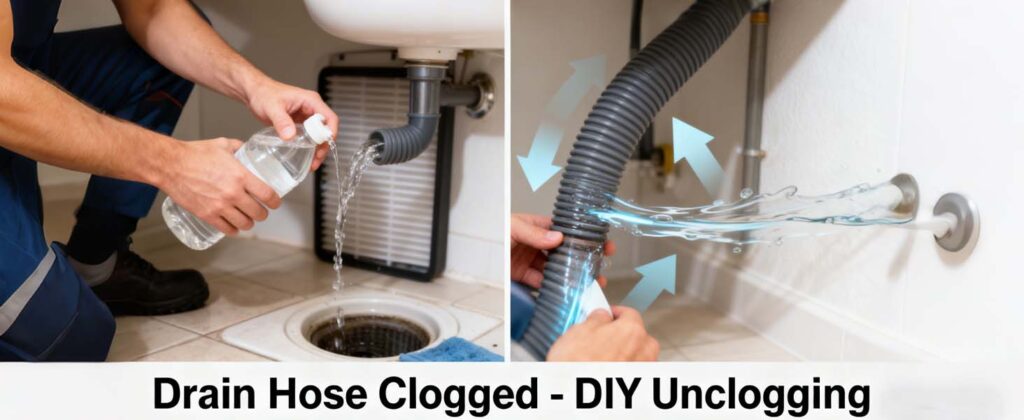
Dehumidifier Drain Hose Clogged. Unclog Like a Plumbing Pro
A dehumidifier drain hose clogged can cause standing water, leading to mold growth. Rapid unclogging restores flow, but prevention through routine flushes keeps systems perfect.
Spot the Signs: Early Warnings of a Clogged Drain
Signs of dehumidifier drain hose clogged include overflow warnings or unusual sounds. Check hoses weekly for kinks or algae. Catching this early prevents leaks and costly floor damage.
DIY Unclogging: Tools and Techniques That Work in Minutes
To fix a dehumidifier drain hose clogged, flush the hose with a vinegar-water solution. Use a drain snake gently for stubborn clogs, then rinse. This clears most blockages without disassembly.
Pro Tip: Installing Inline Filters to Dodge Future Dramas
Add mesh strainers at hose inlets to trap debris, replacing quarterly to maintain patency. For external pump users, integrate check valves to block backflow, ensuring continuous drainage in multi-story homes.
How to Clean a Dehumidifier: Sparkle, Sanitize, and Extend Its Life
Learning how to clean a dehumidifier properly prevents germ growth and maintains air quality.. Simple, routine cleaning keeps your dehumidifier fresh, efficient, and working as it should
Weekly Wipes: Quick Exterior and Coil Refreshers
A weekly step in how to clean a dehumidifier is wiping surfaces and coils carefully. Vacuum coil fins lightly to remove surface dust, enhancing heat transfer without deep interference.
Deep Clean Dive: Disassembling for Mold-Busting Power
A deep step in how to clean a dehumidifier includes soaking washable parts in a mild bleach solution. Gently scrub the water tank, rinse well, and air-dry fully to prevent rust and keep your unit working at full strength.
Eco-Friendly Hacks: Natural Solutions minus the Harsh Chemicals
Use baking soda paste on coils or tea tree oil spray to fight germs safely around pets. These natural options work like store cleaners while being gentler on your home and the environment.
Dehumidifier Error Codes Demystified: Your 2025 Code-Breaker
Part of troubleshooting dehumidifier errors is learning to read and interpret flashing codes.
Common Error Codes: From Sensor Alerts to Environmental Limits
Here’s what the most frequent error codes typically mean and the immediate steps you should take:
Code | Likely Cause | Recommended Action |
E1 | Humidity Sensor or Communication Error | Check that the sensor wire is securely connected at both ends. If connections are fine, the sensor itself may be faulty. |
E4 | Pump Alarm / Pump Issue | The unit will not run until this is cleared. 1) Unplug for 2 minutes to reset. 2) Check pump installation and function. 3) Clean any obstruction in the discharge line. |
E5 | Refrigerant Leak | Stop using the unit and contact your installer or a certified technician for professional assistance. |
L0 | Room Temperature Too Low (< 33.8°F / 1°C) | Increase the room temperature to within the operating range (above 33.8°F). If the error persists, the temperature sensor may need checking. |
HI | Room Temperature Too High (> 104°F / 40°C) | Decrease the room temperature to within the operating range (below 104°F). If the error persists, the temperature sensor may need checking. |
Pump Alarm (E4) – Critical Troubleshooting Steps
If your display shows an E4 error, follow this systematic checklist:
- Reset the Unit: Unplug the power cord completely, wait two minutes, then plug it back in.
- Test the Pump Manually: If your model has a drain button, press it to check if the pump activates and deactivates properly and if it purges any water.
- Inspect for Clogs: Check the entire discharge hose or drain line for kinks or obstructions. Clear any blockage as outlined in the maintenance guide.
- Component Replacement: If cleaning and resetting do not resolve the issue, the hose or pump assembly may need to be replaced.
Custom Codes: Brand-Specific Fixes for Honeywell, Midea, and More
Error code meanings vary by manufacturer. For AlorAir models, always refer to the official user manual to interpret display indicators and alerts accurately.
Advanced Dehumidifier Repair: Beyond Basics for DIY Daredevils
Proper dehumidifier repair requires caution to prevent voiding warranties or causing safety hazards. Proceed only with proper tools and knowledge.
Refrigerant Leaks? Safe Detection and Recharge Tips
Part of professional dehumidifier repair involves detecting refrigerant leaks safely. Refrigerant leaks must be diagnosed and repaired by certified technicians. DIY refrigerant repairs are unsafe and can violate environmental regulations.
Electrical Gremlins: Testing Wires without the Shock
Basic dehumidifier repair can include testing wires safely with a multi meter. Replace frayed leads with UL-listed wires matching gauge specs.
When to Wave the White Flag: Knowing Your Repair Limits
If diagnostics reveal compressor seizures or PCB failures, summon certified techs to avert fire hazards. If repairs exceed 50% of unit cost, replacement is the smarter move.
Pro Maintenance Schedule: Keep Your Dehumidifier Running Flawlessly
Structured care transforms reactive fixes into preventive triumphs, extending reliability through seasons.
Monthly Must-Dos: Filters, Tanks, and Quick Scans
Clean filters, empty drain tanks, and track runtime hours regularly. These routine spots wear early and prevent most breakdowns before they start.
Seasonal Overhauls: Pre-Summer Prep and Winter Storage
Before humid peaks, test full cycles; store off-season in dry spots with covers. These habits combat corrosion from idle exposure.
Longevity Boosters: Smart Habits for a 10+ Year Lifespan
Log usage in apps for predictive alerts, and upgrade to energy-star models for sustained savings. Consistent vigilance yields decades of service.
AlorAir Dehumidifier Specifics: Pro-Tips for Basement & Crawl Space Models
AlorAir dehumidifiers shine in tough whole-home jobs, like basements and crawl spaces. Their tough compressors pull maximum water a day from damp air. The onboard digital control panel allows precise monitoring and adjustment, making it suitable for integration with whole-home humidity management setups.
Built-In Pump Mastery: Avoiding Clogs and Ensuring Continuous Drainage
AlorAir WHD 100–200 units use gravity drainage and do not include a built-in pump. For installations requiring upward drainage, connect an external condensate pump and ensure the drain line remains unobstructed. Flush the lines every two weeks while the unit is upright to prevent oil issues after moving it.
High-Capacity Humidity Control: Optimizing Settings for Large, Tough Spaces
Switch to GPP mode for advanced humidity control in crawl spaces or whole-home systems. This mode is intended for experienced users or professional installations. Add fresh air mode with valves set between 35°F and 95°F for better airflow without wasting power. Check out more at AlorAir Whole Home Dehumidifiers.
Ducting & Ventilation Tips for Crawl Space and Basement Installations
Use 6-inch ducts with gentle curves to cut air drag, and seal all joints tight against leaks. Diagnose early, fix safely, and upgrade when repeated failures outweigh repair costs.